Why is a self-adhesive film so popular?
The major reason for its popularity is the huge number of positive qualities it possesses, as well as its low price. Here is a breakdown of the superior qualities of self-adhesive film;
- The self-adhesive film is almost 10 times cheaper than wallpaper because it is quite easy to make.
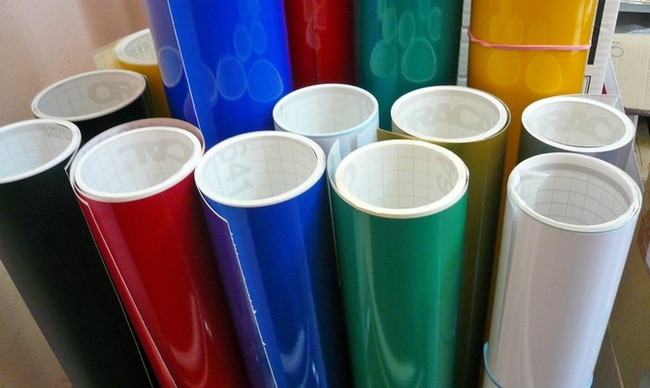
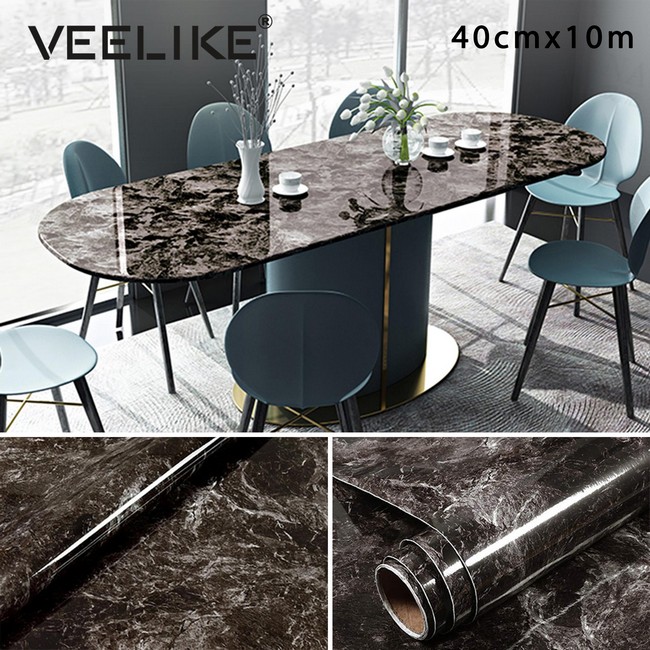
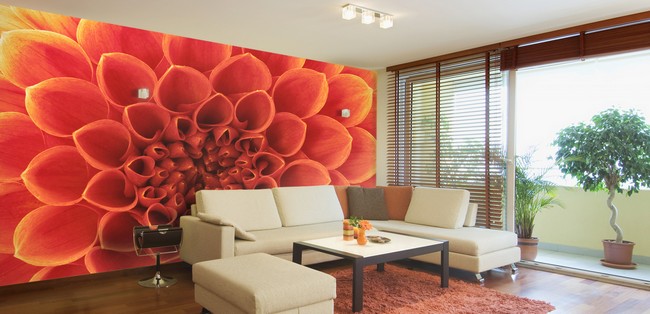
- The film can be produced in any color and pattern.
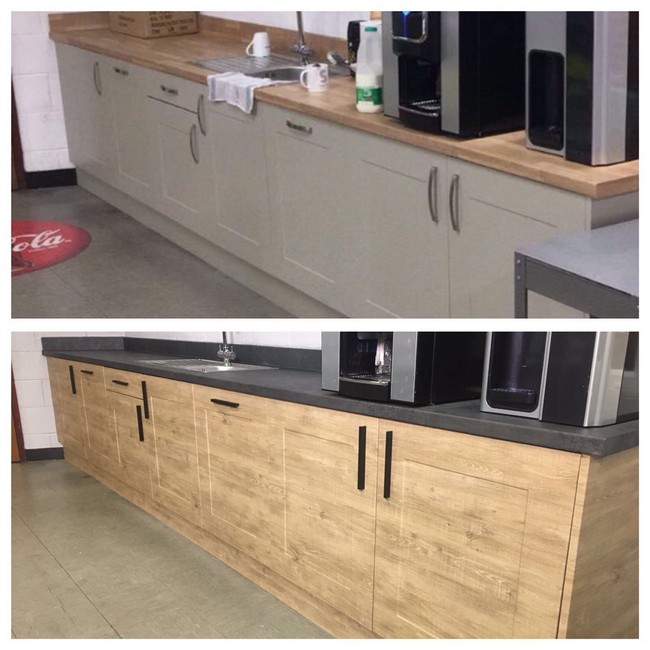
- The adhesive film can be applied onto any type of surface, from concrete to brick, drywall, tile, and even wallpaper.
- Self-adhesive film for the bathroom is waterproof and designed to handle high humidity.
- It is resistant to high temperatures (according to GOST – up to 80 ° C, although some manufacturers indicate a greater value).
- The film is easy to clean. You just wipe with a damp cloth and all the dirt and dust is gone.
- The film can be pasted onto the walls easily and quickly, even by just one person. The process is also simple. You need not hire specialists, because you can easily install the film yourself.
The disadvantages of self-adhesive film include the need to perfectly level the surface on which the film will be applied, as well as its flammability, making it a hazard in case fire breaks out.
The Preparation of the Surface and the Tools that will Aid You
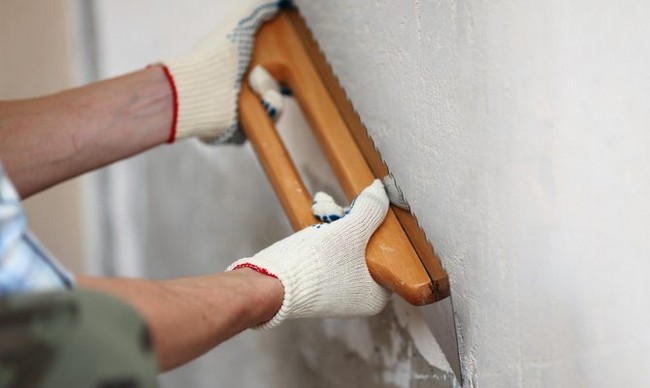
For the adhesive to hold well and for a long time, it is necessary to level the surface to a perfectly smooth state. To do this, all cracks and bumps are eliminated, in case the material is being glued to a bare wall. If the film is being applied to the tile, then the seams at the joints of the tiles have to be sealed to a level common to the tile. Wooden surfaces, on the other hand, are thoroughly polished and varnished, while metal and plasterboard surfaces are cleaned and primed.
After leveling the surface, you have to thoroughly clean it, making sure to get rid of dust, dirt, paint/varnish drips, and, most importantly, grease stains. If you miss these steps or fail to perform them efficiently, then the film will peel off. It is best to degrease the surface with detergents, rather than chemicals like gasoline, alcohol or solvents. If you use these chemicals, the level of fire danger increases. Additionally, these chemicals release toxic fumes, which can lead to poisoning of the body.
Preparing walls for pasting with film
Tools required for the application process include:
- A knife or scissors (Ensure it is sharp).
- Measuring devices like rulers or tape measures.
- A pencil or thin pen for marking.
- Hair dryer (in the absence of an industrial one you can do with household).
- Rubber spatula (you can use felt if you fail to obtain a spatula).
The preparation processadditionally includes markup and film cutting. Before you stick the film, you must cut it into the desired sizes. For ease of sticking, you can opt to bypass areas that present difficulty. Further, if the area to be pasted is large, you can cut the film into sectors and paste it in sections. A sector is a small rectangle (about 500 mm wide) and can be easily glued by one person.
To properly cut the film, you first have to pre-mark it. The marking for cutting is made using a ruler and pencil. The reverse side, on which the paper is located and glue spread on, is then laid out.
After marking, the film roll is cut. If sections are numerous, you need to ensure you number them during cutting, starting from left to right and from top to bottom (i.e., the upper left square has the number “1”, the adjacent one on the right is “2”, etc.). Similarly, the wall itself is marked to ensurea perfect fit.

It is important to remember that this method is effective only if the film roll has an incomplete pattern (that is, the pattern is not spread out on the entire surface). In all other cases, you need to be extra cautious aboutthe sticking of the cut sectors.
You should cut the film into sectorsusing a knife or scissors. As mentioned beforehand, these tools have to be extremely sharp, otherwise they will destroy the film.
Pasting the Film onto the Walls
After all the preparatory work has been completed, you can proceed to the gluing of the film. Almost all manufacturers provide rules and descriptions to guide customers with the gluing process. Most likely, you can find these at the back of the film. It is extremely important that you thoroughly read and understand the rules before sectioning the film.
For a less troublesome process of sticking film on tile, glass, or metallic surfaces, you should first spray the surface using a special spray or water. For more convenience, use a sprayer that lets out few drops at a time.
The backing paper is then slowly and carefully removed from the back of the cut-out rectangles. After complete separation of the substrate from the film, the film is gently applied onto the desired section of the wall.
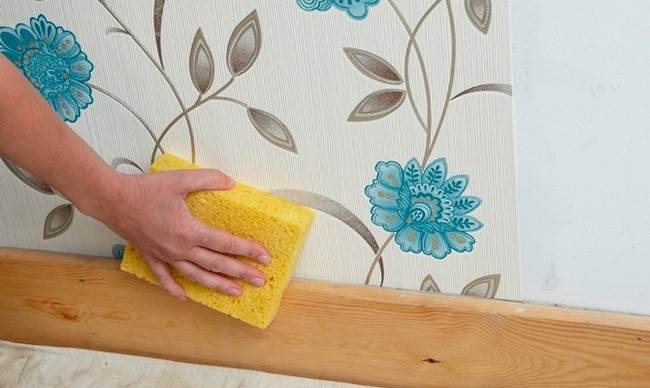
During the application, remember to press the film tightly onto the wall, squeezing out any air that may be trapped in between the film and wall. This is done using a cloth or spatula. The process of squeezing out bubbles basically entailsmaking smoothing movements from the center of the glued piece to the edges. After completing this step, you then have to blow-dry the glued piece, thereby preventing the formation of bubbles and ensuring better attachment of the film onto the wall. If the air bubbles cannot be squeezed out, you can puncture them with a thin needle, then thoroughly dry the spot.
For the corners to be even, it is necessary to observe several rules when cutting the film. First, the cut-out sector of the film must be glued onto the adjacent section of the wall until the process is complete. On the part of the film which is glued to the next wall, make several cuts at an angle of 45 degrees. To round the edges of the film, you neednot cut it, instead, just warm it up with a hairdryer and bend the edges at the required angle.
After the entire surface is glued, it is dried with a hair dryer for another time, ensuring the sectors are well aligned with each other.
How to Maintain and Care for the Film
Self-adhesive film, even when used in the bathroom, does not require complex manipulations or special tools. Dirty areas of the surface of the adhesive can be cleaned using a dry or wet soft cloth, depending on the nature of the dirt. If necessary, greasy and hard-to-rub off stains are washed off with a cloth moistened with alcohol or any alcohol-containing liquid.
Avoid dense rough sponges, powder detergents, liquids with petroleum base, such as kerosene, gasoline, or solvents, when cleaning self-adhesive film. These liquids will discolor the film and destroy its patterns, as well as damaging the surface of the film.
Therefore, self-bonding allows you to easily and speedily change the interior, whether you are undertaking major repairs or instituting minor temporary changes in your bathroom.
hat is the need for self-adhesive filWhat is the need for self-adhesive film for the bathroom and how to use it?
m for the bathroom and how to use it


